
.png)
One great service by AWS is DynamoDB which is well known for being an efficient, highly available, secure and fast service to store and retrieve data. You can find a plethora of tutorials and articles online dedicated on how to design your tables, how to code your accesses, the permissions you may need, etc. In this article, I want to address our attention on an interesting feature called Time-To-Live, that will allow you to store records in a time-expiring fashion. The use case in which this article will be based, is a table that will contain one time code, that will expire if not used after one hour.
What's needed
- An AWS account - If you don’t have one is straightforward to create one following this link: https://portal.aws.amazon.com/billing/signup
- In this article we’ll calculate the timestamp of the expiring codes using Node, but you can use whatever method you prefer.
How The TTL Attribute Works
The TTL attribute essentially tells AWS DynamoDB service to remove a record after at LEAST a period of time.
As a developer you will naturally expect that after the time-to-live period specified, the record will be removed.
The actual approach is that a background service will eventually be triggered, removing any record from tables using TTL attributes whose value expires by the time this service is executed.
So this is more a mark for records to be removed in the future, once they’re no longer needed. The useful thing here is that you don’t need to manually delete your records or set up cron jobs to remove these stale records.
This implies that you need to filter expired records out from your queries and scans.
Create the table
We need to create a table in DynamoDB and specify which of the attributes will be used for TTL. Let’s create a table called “OTP” with two attributes: code and expireAt, following these steps:
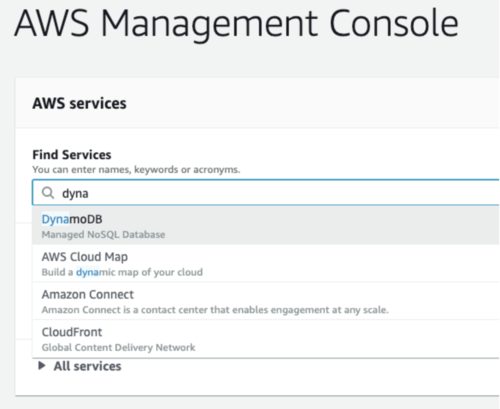
1. Head your browser to https://console.aws.amazon.com/console/home
2. Once in there, type in the name “DynamoDB” in the service search box.
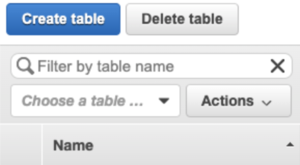
3. Now hit the blue button labeled “Create Table”
4. In the field “Table name” type “OTP”; and “code” in the “Primary key” field
5. All other default values will be good enough for this exercise
6. You should have something similar to:

7. Now click on the “Create” button
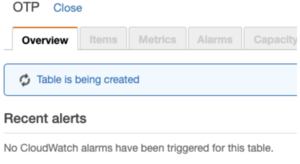
8. For a while you’ll see something like this:
Create some sample records
Now let’s create some records for our example; once the table has been created, you’ll see the following on the right panel of the console:

1. Go to the “Items” tab and click on the “Create Item” button, you should see something like this:
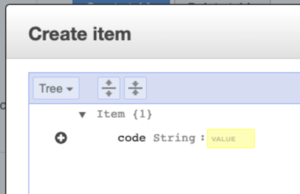
To create records, you must specify the primary key for our table which is “code”, and you should also add the field “expiresAt” in each record by clicking on the plus sign and selecting append/number as the attribute type.
.png)
1. Let’s create three records for the example; for these, you’ll need to calculate the unix time when each code will expire. One way is using node repl, by opening a terminal and typing “node” if you have it installed.
2. In node repl, enter the following instruction: 3600 + parseInt(new Date().getTime()/1000)
3. This will return the number of seconds elapsed from Jan 1st 1970 until now, and adds 3600 seconds to that, that means an hour from now. If you’re curious about the use of this type of date format, take a look at https://en.wikipedia.org/wiki/Unix_time
4. Copy the number you just got from the previous step and paste it into the field expiresAt.
5. Do this by adding two more records, one with 7200 seconds from now and a third one with 10800 seconds from now. As you may have noticed, this is adding records to expire in one hour, two hours and three hours from now.
As you may think, you now click on the “Manage TTL” link shown in the figure above. You should see:
.png)
Evaluate records
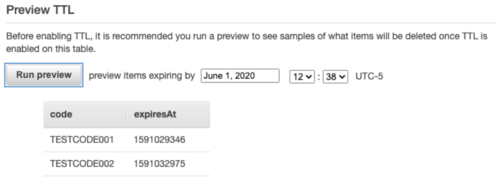
To know effectively which records will be removed, the DynamoDB AWS service provides a very helpful tool, which you can find in the “Preview TTL” section of the previous screenshot.
The way it works is by you specifying a date and time, therefore, when clicking on the “Run Preview” button, you should be able to see the records that will be removed by that time.
If you don’t get to see the records you’d expect to be removed, please make sure you have calculated the expiration unix datetime properly, this seems to be a very common issue when implementing this feature.
In our case, let’s see which records will be removed one hour and one minutes from now, if you’ve followed this article to the letter, you should see the following:
For one hour
.png)
For two hours
For three hours
.png)
This preview TTL feature helps us to confirm that we’re implementing the feature correctly, so we can be sure that the records will be available as desired.
Enable TTL
Now to enable TTL, simply click on the button labeled “Continue”. It will take some time for AWS to set up everything that’s needed for this feature to work. During the time this is happening, you won’t be able to edit the TTL setting.
Summary
- One attribute in the table may be set as TTL
- The TTL value is set in unix epoch, which is the number of seconds elapsed since January 1st 1970
- TTL should be a value in the future
- This feature won’t remove records instantly after they have expired, it’s more similar to a mark for records to be swiped out once they expired
- AWS will run a background process that removes records expired
- It’s not known when the background process will be executed so queries should filter out records that are already expired